

Disclosure: This post contains affiliate links. I may earn a commission from qualifying purchases at no extra cost to you. 🩷
If you’ve been anywhere near the hair side of social media lately, then you’ve probably seen miracle knots taking over your timeline. I kept seeing these beautiful, natural-looking installs everywhere and, honestly? I was intrigued.
There was something about the way the hair looked so fluffy, realistic, and effortless that immediately caught my attention. As someone who loves a big, full hairstyle, I already knew this was something I wanted to try.
So of course… I had to see what the hype was about for myself. 😂
In this post, I’m sharing my full miracle knots install experience, including the hair I used, how I installed them, my honest first impressions, and whether I would do this style again.
Spoiler alert: I already know the answer. 😭✨
⸻
What Are Miracle Knots?
Miracle knots are a protective hairstyle technique where hair strands are attached in a way that creates a more natural-looking appearance compared to traditional braiding methods.
One of the biggest reasons people love a miracle knots install is the realistic finish. The technique allows the hair to look fuller, more seamless, and gives that “this could be growing from my scalp” illusion that everyone is chasing.
Of course, like any hairstyle, the results depend on the installation method, the hair used, and how well you take care of the style afterwards.
⸻
The Hair I Used For My Miracle Knots Install
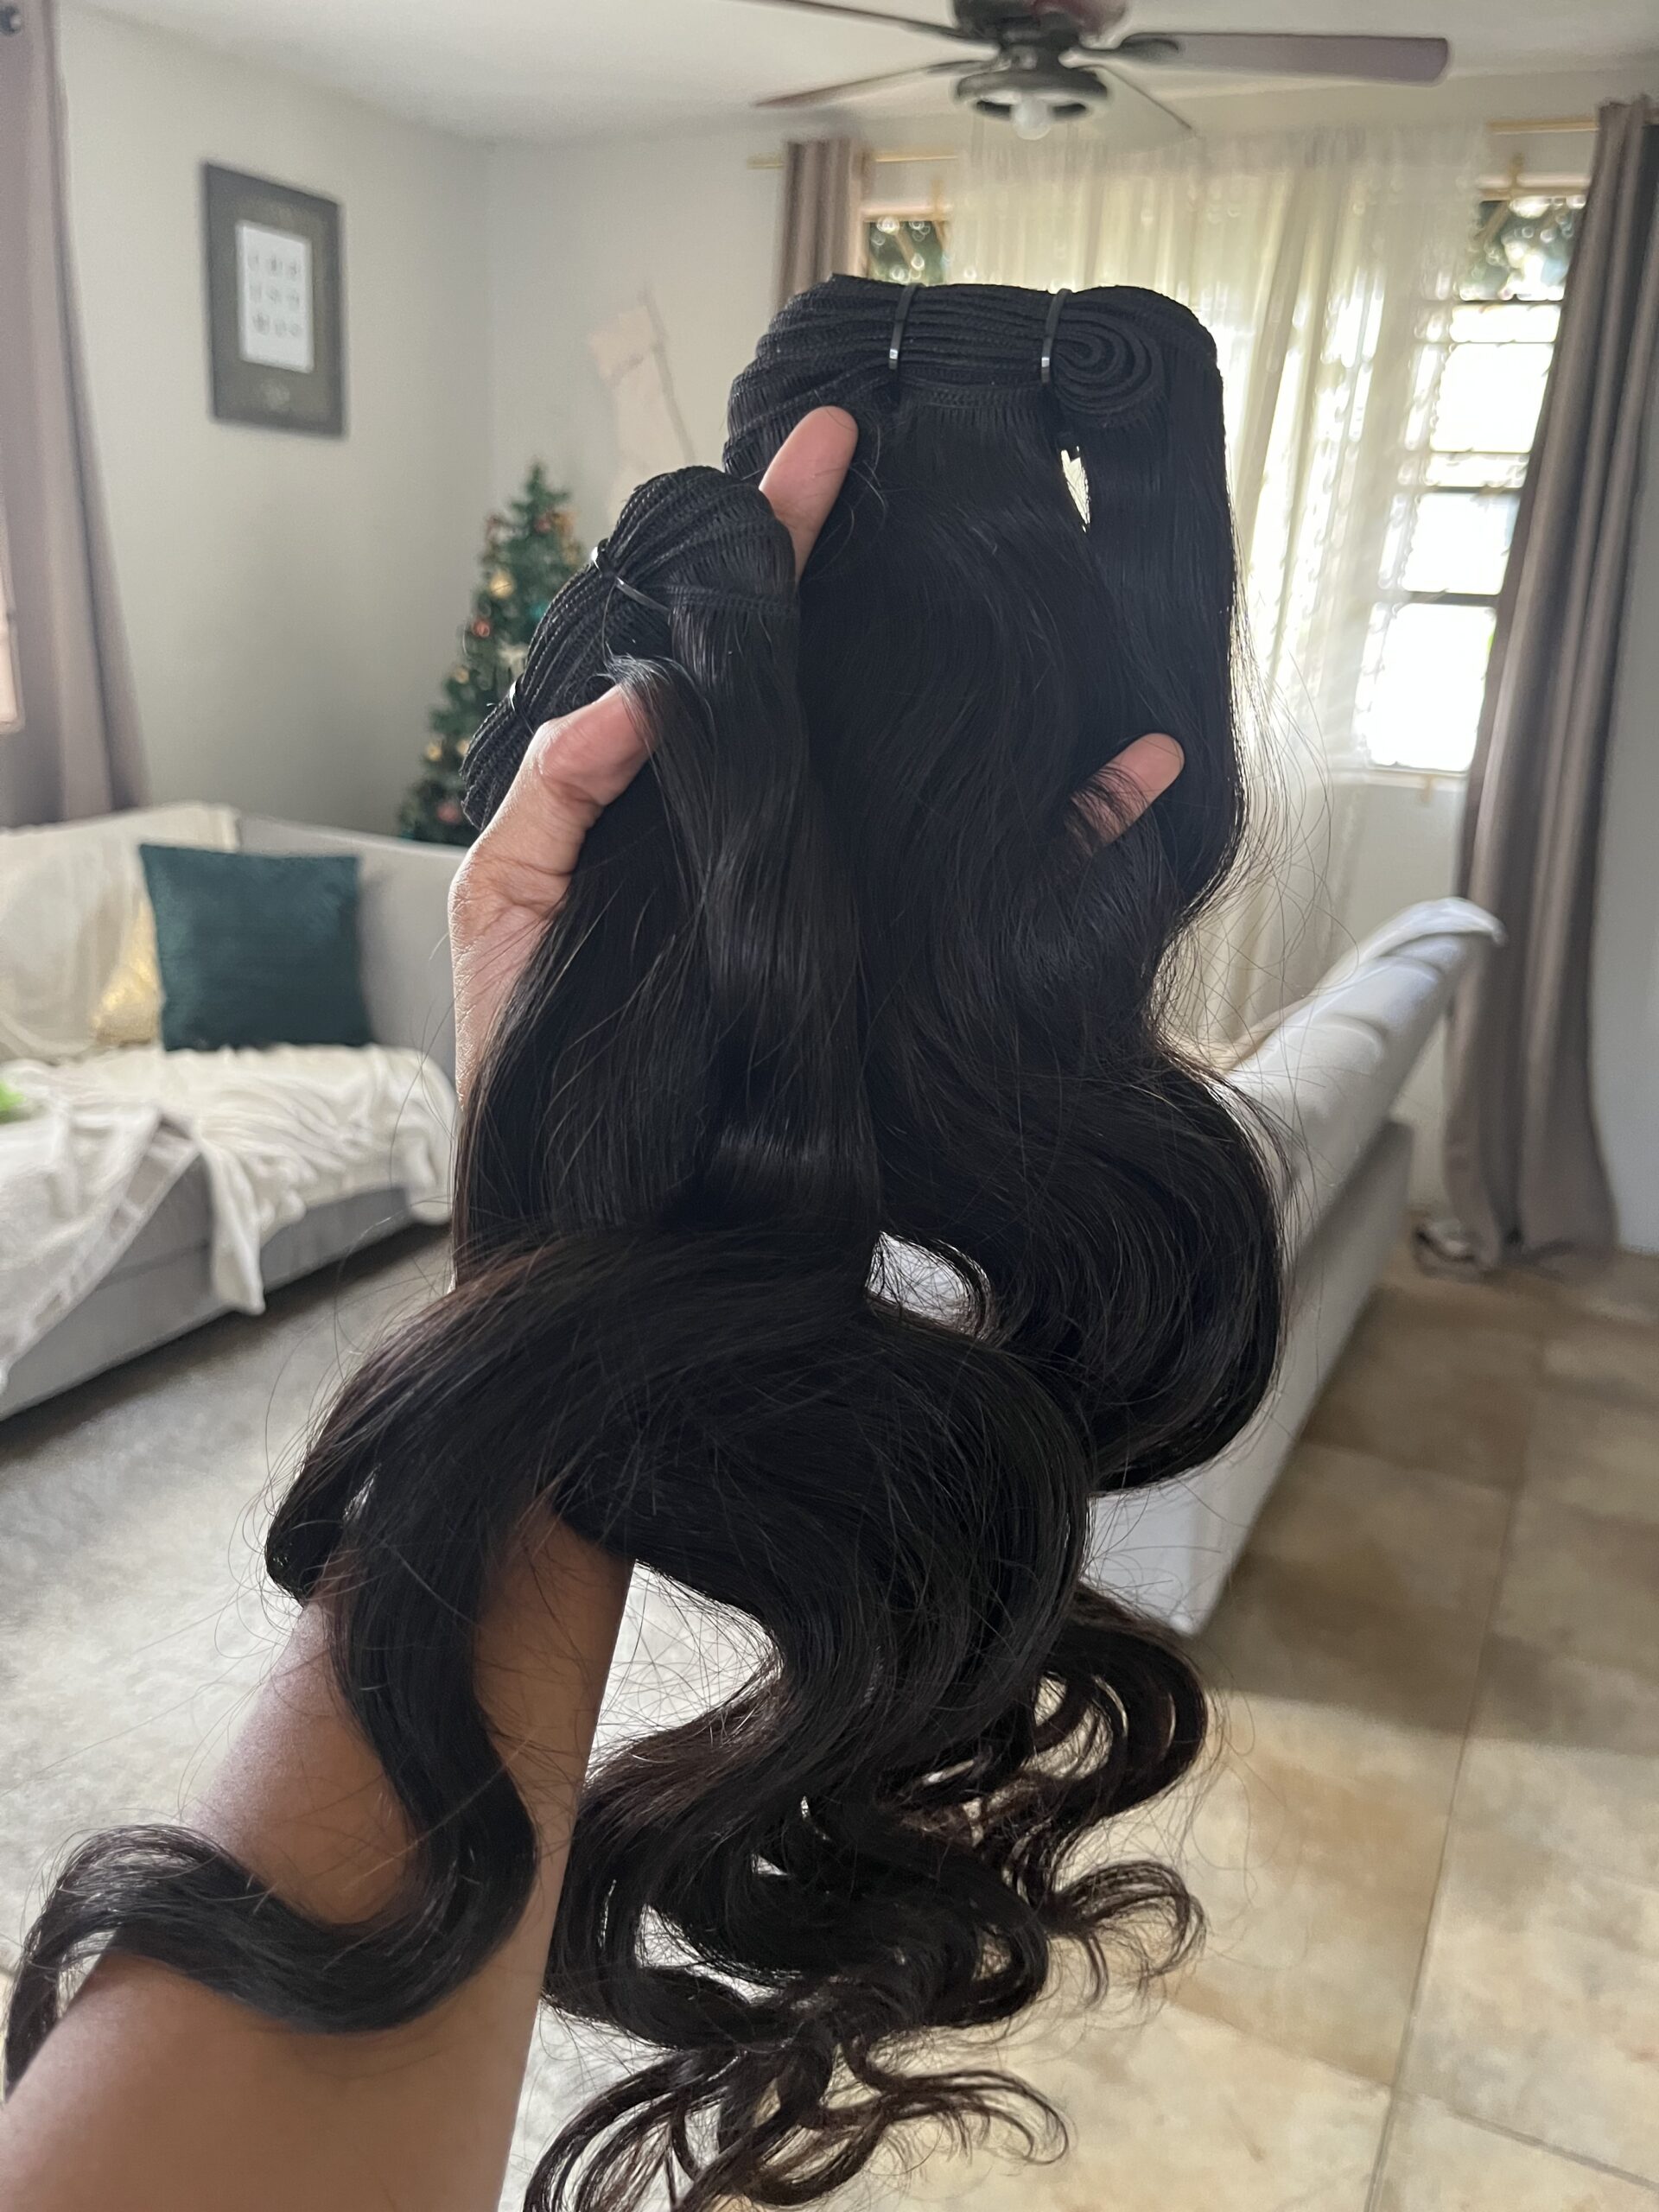
For this install, I used 18-inch Burmese curly hair in a natural black color from EZ Wigs, a local hair store here in Barbados.
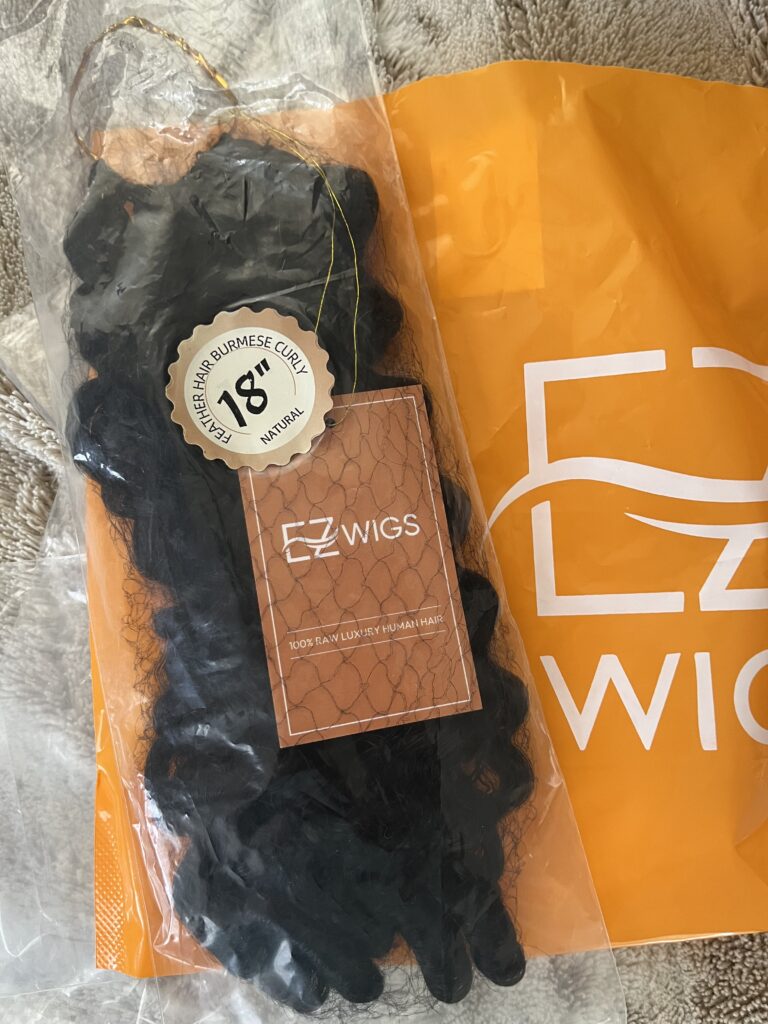
I had been seeing the Burmese curl pattern circulating for a while and I instantly fell in love. The texture was giving everything I wanted — soft, fluffy, and effortless.
I already knew it would be perfect for miracle knots, especially during the summer months. There’s something about curly hair that gives that beachy island girl look, and living in Barbados, I’m always looking for styles that fit that vibe. 😂
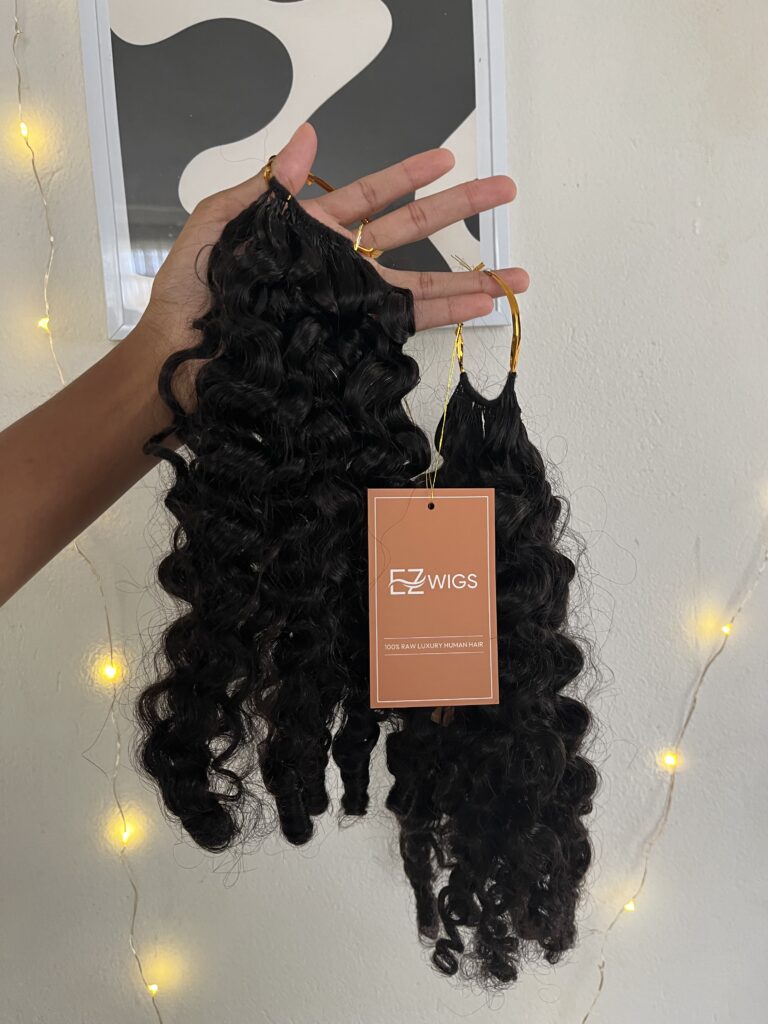
Another reason I chose this hair was because of the amount of hair included. These bundles came with 50 strands each, which honestly made the decision so much easier.
I’ve seen some other miracle knots hair options advertised with only 20 strands per bundle (more expensive too!) and I was sitting there thinking…
“Okay… but what am I supposed to do with that?” 😭
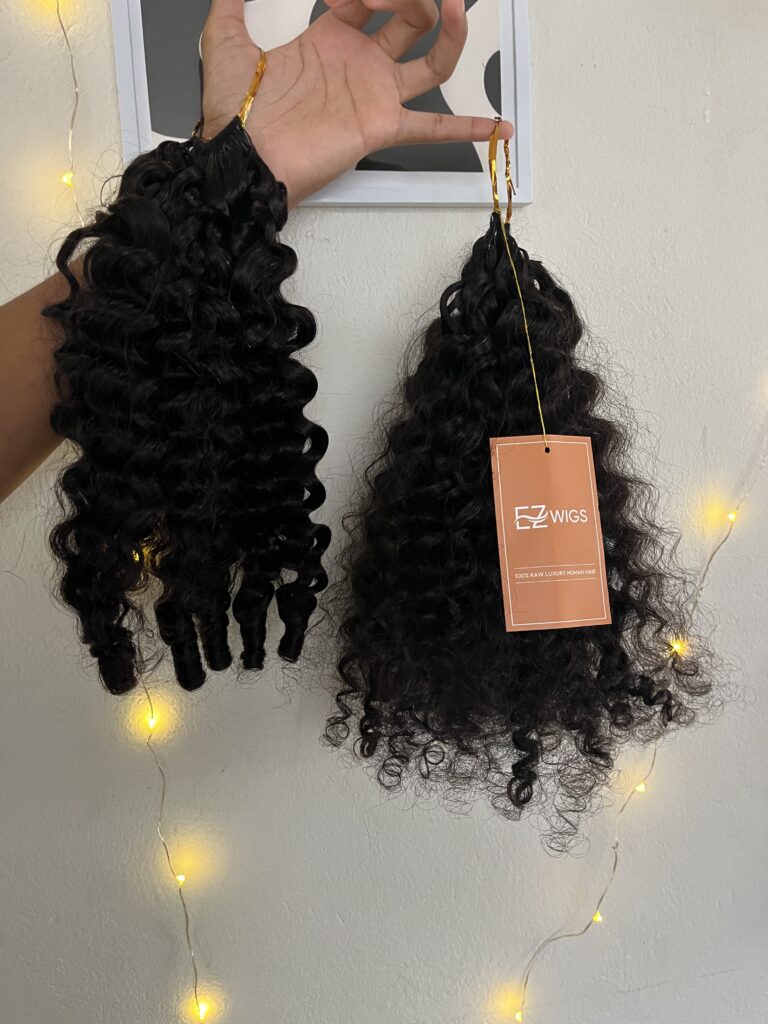
I wanted enough hair to create a full, fluffy look without worrying about running out halfway through my install. So purchasing my Burmese curly bundles from EZ Wigs was a no-brainer.
⸻
My Miracle Knots Install Process
Preparing The Hair
The first thing I did after getting my hair was wash and condition it immediately.
Not going to lie — the hair did have a smell when I first opened it, which is completely normal with packaged hair. This is exactly why you should never skip washing your bundles before installing them!
I used my ORS Olive Oil Shampoo along with my Silicon Mix treatment. After conditioning, I let the hair air dry completely before starting my install.
A fresh, clean base makes such a difference when installing any protective style.
⸻
Creating My Foundation
One thing about me? I LOVE pre-parting. 😂
It saves so much time and makes the actual installation process feel way less overwhelming.
Once my sections were done, it was officially time to start installing.
And yes… it was night time.
But it was go time. 😭😂
⸻
Installing The Miracle Knots
Honestly? Installing the miracle knots was way easier than I expected.
I decided to braid mine into my hair instead of crocheting them because I felt like it would make takedown easier and reduce unnecessary stress on my natural hair.
Personally, I couldn’t imagine tying knots around my natural braids with hair strands that are already bonded together with thread.
That just feels like I’m asking for problems. 😂
I wanted a method that gave me the beautiful result without feeling like my hair was fighting for its life underneath.
⸻
Blending And Styling The Hair
For styling, I kept things very simple.
I mixed conditioner and water in a spray bottle and used that to refresh the curls. This helped keep the hair moisturized, soft, and tangle-free.
Also, remember the leave-in conditioner spray that I talked about in my current favorites post? Before braids the miracle knots in, I used that on my hair (especially the ends) and smokkin edge control for clean parts and molding each braid (specifically on my roots).
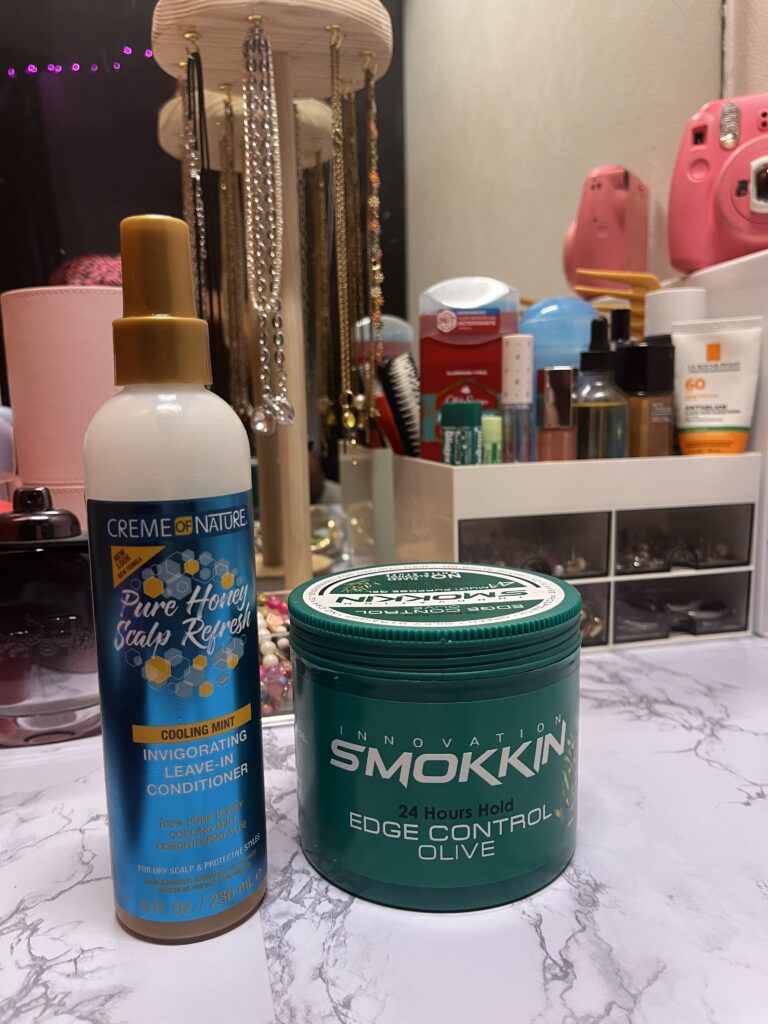
The best part? The curls had already fell into place and I didn’t need to do too much.
⸻
Final Touches
Once everything was installed, I focused on shaping the curls, refreshing the hair, and making sure the final look had the volume I wanted.
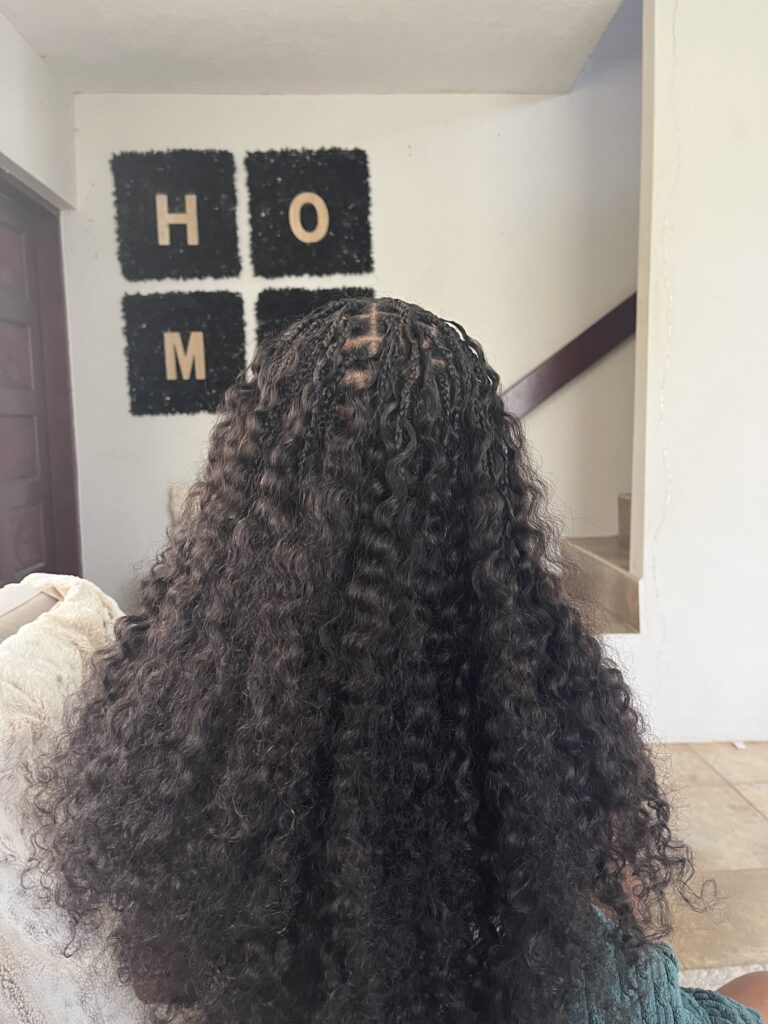
And honestly? The fluffier, the better. 😂
⸻
My Honest First Impression Of Miracle Knots
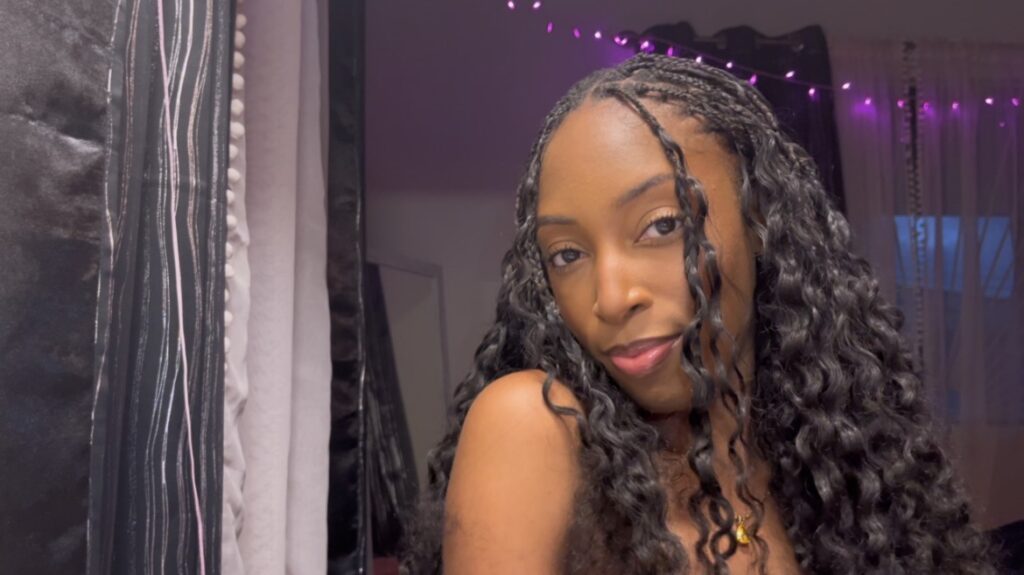
The second I finished installing my miracle knots, I loved them.
I personally love big hair, so seeing how fluffy and full the finished look was immediately sold me.
At that point, I didn’t even care if my parts were crooked.
(Okay, I’m kidding… because crooked parts are literally my biggest fear. 😂)
Speaking of parts, I had my sister help me part the back of my hair and I was honestly surprised that it came out right.
Whew.
Close one. 😩😂
One thing I really loved was how soft the hair stayed. I hadn’t even added any styling products yet and the hair was still super soft, barely tangling, and had almost no shedding.
It honestly felt like the perfect braiding session — simple, smooth, and hassle-free.
My only little moment of panic happened when I started braiding.
Because my parts were so small, I started thinking:
“Please don’t tell me I’m about to run out of hair.” 😭
Luckily, I ended up having more than enough.
Crisis avoided. 😂
⸻
Pros And Cons Of Miracle Knots
Pros
✨ Natural-looking finish
✨ Lightweight protective style
✨ Fuller, fluffier appearance
✨ Less tension compared to some traditional installs
✨ Versatile styling options
✨ Beginner-friendly depending on your chosen installation method
Cons
❌ Installation can be time-consuming
❌ Smaller parts require patience
❌ The technique may take practice to perfect
❌ User error may cause damage during takedown
⸻
Would I Do Miracle Knots Again?
Absolutely.
I would do a miracle knots install again and again.
Honestly, I think this is the goal when it comes to protective styles: beautiful hair without needing to sit for endless hours or deal with unnecessary tension.
The process was comfortable, the result was gorgeous, and the hair looked amazing.
Plus… the final look is just prettier. So why not? 😂
I definitely recommend giving miracle knots a try if you’re interested in experimenting with a new protective hairstyle.
Even if you don’t know how to perfectly part your own hair or install them yourself, there are so many different methods and tutorials available that can make the process beginner-friendly.
There has been a lot of discussion online about miracle knots and some people sharing concerns about hair loss after takedown. Personally, I think proper installation and removal are key.
For me, braiding them in was the method that made the most sense because I wanted something secure but still gentle on my natural hair.
The next time I install them, the only thing I would change is the style.
Because trust me… the possibilities are endless. 😭✨
Have you tried miracle knots yet? Let me know your thoughts!
4 responses to “I tried miracle knots for the first time ✨ | my honest miracle knots install experience”
-
Are that up. Patience def unmatched regarding the parts for sure !
-
Thank you so much girl! 🫶🏽
-
-
Love love love 💖
How much did the Burmese hair cost 👀
I got a quote of $800 for install and hair, wondering if it’s worth it…..-
Thank you Mona! 🫶🏽🫶🏽
Girl what?? EZ wigs has a bundle of 50 strands for only $170.00 (haven’t found a better deal anywhere else). I got 3 bundles.
$800 definitely seems like a stretch.
-




Leave a Reply